All posts relating to Maxwell Render 1.x
User avatar
By jdp
#161862
brilliant tests larsson. 8)
those last ones are really close, maybe the flakes are too much noticeable: too large?
User avatar
By LarsSon
#161870
There were some problems with mapping in those renderings.
Now it's fixed and rendering updates.

It's really hard to render material where should be exactly right
sized noise. After sl 10 i'm just starting to see what noise is from
material, not from low sl. :?

Well, i'll keep playing and showing you where this thing is going. :wink:


-LarsSon
User avatar
By 3dtrialpractice
#161962
OHH my.. these are great... ESP the metalic X2 and X3..
the flake size can probably easily be changed via the "tile amount" in material editor's image loader...( if the flakes are a seprate image).. so if one thinks they are too big just tile em more.. or make em even bigger give em less tile...


The very first Basic car paint. seems a big too bright in the falloff areas on the door/bumper.. thats maybe why the comment was that it was flat looking.. maybe decrees the color or Nd of the base material in that one .. just to give it more darkening(contrast).. but i like the idea that you have a basic "cheap" car pain.. something to use for regular cars..since alot of cars just dont have the fancy paint jobs.. (also like that you rendered all images with a bi of glare on the highlight.. nice touch.. and maybe helps bling the flakes a bit..)

very sweet.. ive been trying to do a car paint sine this thread started and my results have sucked..

youve definatly hit the mark with all your car paints..

I really like how you incorpirated Bump map into the "seacreature" carpaint try on page 2 ..

Ohh.. maybe that bump map will help the basic car paint to look a bit more baic and regualr to have nig bumps on it distorting those perfect reflections...

cant wait to see the screen shots of your material setups

very very nice works

-luke
User avatar
By Tim Ellis
#162404
Top work again LarsSon mate.

Here's my tests and material settings for what I feel is the best one I've created. (Quite possibly not the best that M~R can produce.)

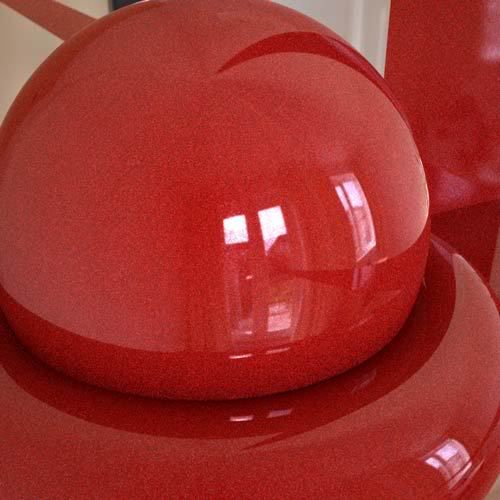
4 BSDF layers, 2 with weightmapped & thickness controlled coatings. Each bsdf, has a single 2000x2000 normal map, created by me using Max & Blender, which is then tiled for the object.
Each coating has it's own thickness map, one is the invert of the other, with a range from 100-100000nm.
ImageImage
ImageImage

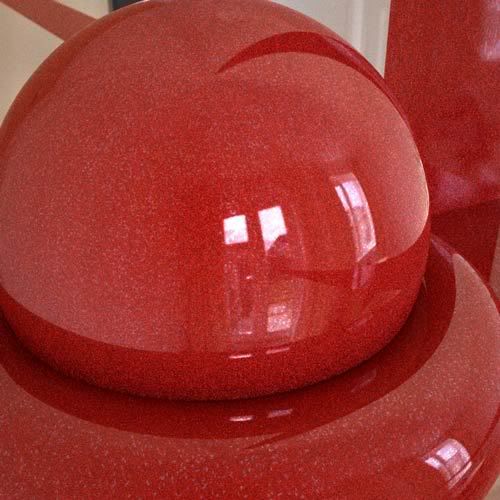
2 BSDF layers, one with Normal map for flakes, other with thickness controlled coating:-
ImageImage
ImageImage

Improved maps for flakes, methods as before but with a few tweaks:- (Tell tale signs of normal maps in use, are these shadow edges.)
ImageImage
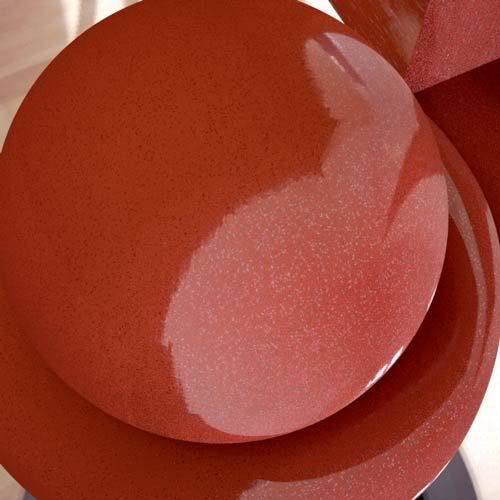
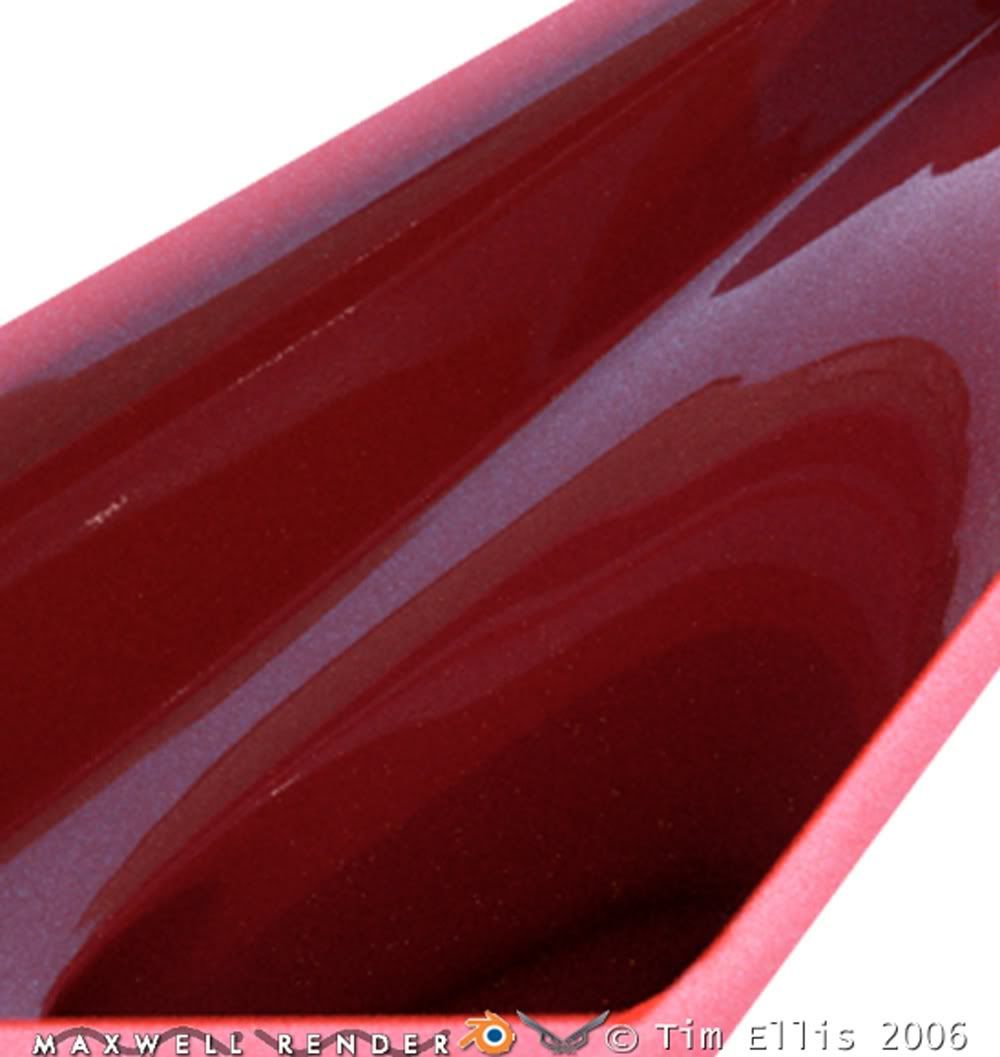
Final so far:- Removed all normal maps and used weightmapped/thickness controlled coating & bsdf layer method.
Also added inverted coating map for roughness map. (Intended to help with the sparkle of the flakes.)
2x tiling for flake map:-.............................................................................................The same but with 3 x tiling for flakes map (Different HDRI):-
ImageImage
And 5x tiling for flake map:-
Image

Settings for one above:-
Image
Image

The top two bsdf layers could be weightmapped, as in my earlier tests, for a more dappled/two tone effect between the colours. I used 15 & 35 as I started with 30 & 70, to help the flakes layer mix better.

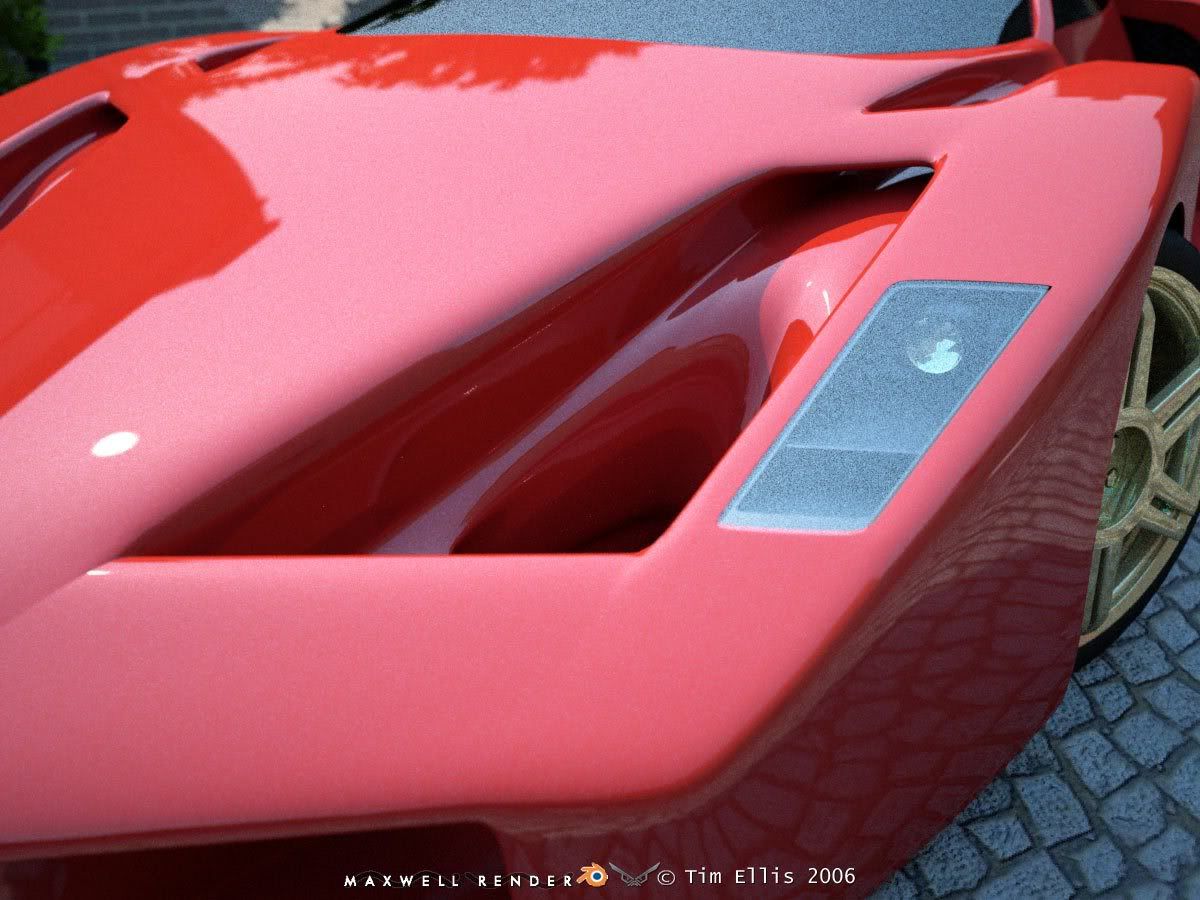
I'm currently re-rendering my Enzo model, with the paint in the final two tests shown above. I'll post this today.


Tim.
Last edited by Tim Ellis on Mon Jun 19, 2006 3:57 am, edited 1 time in total.
User avatar
By Mihai
#162408
I know in this one is perhaps not the best to show off flakes, but I really like it!

Image


Great experiments :)
User avatar
By Tyrone Marshall
#162420
Mihai wrote:I know in this one is perhaps not the best to show off flakes, but I really like it!

Great experiments :)
This is top!

Great work happening here! :D
User avatar
By LarsSon
#162445
:D Great looking materials Tim!

I like the way how flakes are visible in your materials.
I also tried to use normal mapping and had really good results... NOT! :?

Your material setup is allmost similar as mine. The amount of variations
there can be is thousands. I mean that still all variations looks right.

Q: Why are you using lambertian mode in color layer?
I'm thinking these as real paint layers. So the first paint layer is not
shiny, but it can't be lambert.

Now i have rendered alot of bump mapping tests. Trying to find exactly
the right look how real car paint surface goes. Small amount of allmost
regular smooth bump.

I'll be back soon. But now... So me the ENZO! :D

-LarsSon
User avatar
By Tim Ellis
#162471
LarsSon wrote::D Great looking materials Tim!

I like the way how flakes are visible in your materials.
I also tried to use normal mapping and had really good results... NOT! :?
I have had difficulties with the normal maps, I think because they are still not working correctly. Hence my not using them anymore.
LarsSon wrote::Your material setup is allmost similar as mine. The amount of variations
there can be is thousands. I mean that still all variations looks right.

Q: Why are you using lambertian mode in color layer?
I'm thinking these as real paint layers. So the first paint layer is not
shiny, but it can't be lambert.
M~R does not manage it's materials in a stack. ie, not the top layer, then the next, then the next etc. It manages them all at once, hence the weightmapping.
So it's irrelevant as to where in the stack the lambertian and coating layers are, as they are all calculated at the same time.

I'd love for it to work as a stack. Layer 1 = top layer, layer 2= next layer below that etc. Not as it does now.
(Well at least we could do with an option between the two.)
LarsSon wrote::Now i have rendered alot of bump mapping tests. Trying to find exactly
the right look how real car paint surface goes. Small amount of allmost
regular smooth bump.

I'll be back soon. But now... Show me the ENZO! :D

-LarsSon
Bump mapping will only need to be tiny, for the paint surface. I'll try and take some photo's of the metallic/pearlescent paint on my car for reference.

The closest I came to is in the first two test images, which had two coatings with different thickness & weightmapping. This gives the nice dappling effect that can be seen on paint close up.

More tonight,

Tim.
User avatar
By LarsSon
#162473
I don't agree about bump mapping. Well there are so
many different styles...

In Enzo, i think there are really light and tiny bump. But
if you watch those basic cars like Fiat Punto or Toyota.
The surface in those cars are far away from perfect. There
is this really noticeable bump like in those hand made metal objects.

But if you are going to make expensive sport car paint, i'll make
the cheap one. Then we have both at the end. :D

I'm sorry that i can't post material editor images or more details right now.
I have soooo much real work to do. So i'm doing this paint project with
my home pc (not fast one). 2 hours before i go to work and 2 hours before
midnight. In between machine is rendering new version all the time.


-LarsSon
User avatar
By Kabe
#162474
LarsSon wrote:if you watch those basic cars like Fiat Punto or Toyota.
The surface in those cars are far away from perfect. There
is this really noticeable bump like in those hand made metal objects.
Well, this hasn't to do with basic in the terms of cheap...

All modern cars are painted in colors which contain very little solvents
because of environment regulations. These colors don't give the same
surface quality like the old ones.

It doesn't show much with metallic paints though... but you can't deliver
a non-metallic british racing green in the quality of 1950 in mass production.

Kabe
User avatar
By LarsSon
#162478
Thanks for advice Kabe.

So i must focus in mass production cars then. :wink:
User avatar
By Tim Ellis
#162719
LarsSon, thank you for spending time on this side project. It's really appreciated. :D


Enzo re-rendered (flake tiling @ 5x):-

Image

Increased tiling again for the flakes texture (10x):- (Mucho noise due to short render times on this one.)

Image

Zoom:-
Image

It's getting there I think. With a glare apature map the flakes really come alive. (Sorry but I forgot to bring a glare version today, will upload one tonight.)

Super smooth paint work on cars is usually due to the application of wax &/or polish. All the little pits and dimples that you can see on fresh paint, from the spray gun, are filled in.

Prior to this treatment the paint surface is quite uneven, but on a minute scale.

I didn't have chance to take any reference photos, but hopefully tomorrow, time permitting.

Cheers,

Tim.
By JDHill
#162725
...so...when do we get to see the pimped-out, lime-green/gold-flake '64 Impala drop-top? :P
User avatar
By Tim Ellis
#162729
JDHill wrote:...so...when do we get to see the pimped-out, lime-green/gold-flake '64 Impala drop-top? :P
pmsl, not long my young apprentice..... ;)


>Seeking Impala blueprints right now......
User avatar
By LarsSon
#162758
Really good Tim!

Flakes works really nicely again. I like 10x size more.
Before this flake material your car paint looked plastic like.
Now it's alive and it's showing the shape of your car better.

Somehow it's still too perfect for my taste. I'm looking for
realism, not absolut beauty. :roll:

Using glare is must thing with flakes. With glare we can push
those overbrighted flakes visible.

-LarsSon
  • 1
  • 2
  • 3
  • 4
  • 5
  • 6
  • 8

Workaround using the "RESOURCES BROWSER"[…]

render engines and Maxwell

I'm talking about arch-viz and architecture as tho[…]

> .\maxwell.exe -benchwell -nowait -priority:[…]