ludi wrote:did you made the cloth Collection from Digital-X Models
no, i made it from a cube.

then i subdivided the cube.

then i unwrapped the mesh (shown above)
then i took this image and warped it to fit over the uvs i exported from silo

then i saved the image and assigned it to the model. (shown above)
then i exported the model as an OBJ and took it into max

then i assigned the cloth modifier to the mesh, like i said above and hit the simulate button. (of course before doing so, i had to convert the single mesh into an editable poly, detach the shirt from the hangar, and autosmooth each mesh from there)

then once it settled to the desired position, i converted it again to an editable poly and tweaked areas by pulling and pushing vertices around with soft select enabled.

that's when i opened up the material editor, switched my default renderer to mental ray, created a new archdesign material with a matte finish, placed the uv map i made (see above) and turned on ambient occlusion.

then once i was happy with the material i made, i drew a spline for the metal hangar piece.

then once i had the right shape for the hangar, i selected vertices and filleted them to create a smooth curve. once i got the curves looking the way i wanted them, i enabled thickness to the spline and converted it to an editable poly so that it would export as a mesh/poly instead of disapearing as a spline.

then i set up two mental ray omni lights (one cold, one warm) and placed a skylight in the scene and lowered its value so i could get a nice soft global illumination.

then i hit the render button.

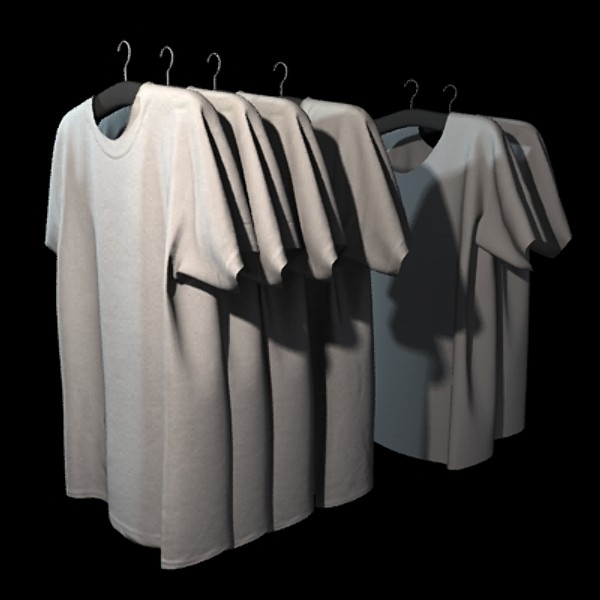
before i hit the render button, i cloned several shirts out and threw the first set of trial shirts i made into the scene. (it took several attempts to make the shirt look the way i wanted it to)

once i had all the shirts lined up and i hit the render button, i got something that looked like this:

then i dollied around the shirts i had finished making and took a few more shots. when i had the shots i wanted, i switched my viewport display to hidden line mode and took a screen print of the mesh(es)

once i had everything i needed, i packaged all the files into a single directory and zipped up anything that was necessary. (you can also see some more files for shirts that i am in the process of making. i can explain how i made those too if you like once they are finished)

once i had everything zipped up, i went and logged into my turbosquid account. username: rusteberg password: ************

then once i went to my user dashboard interface and clicked the "upload files" button and began to upload all the files i zipped. (see above)

once i had all the files i created uploaded, i hit the "create product" button and filled in all the proper information for the product i had just made.

then i hit the "publish" button and waited for my product to enter the turbosquid system.

once my product was in the turbosquid system, i went and logged on to the maxwell forum so i could post my product in the off topic section in case anyone might be interested in purchasing the 3d t-shirts i had just made.

then ludi asked me how i made the shirts.
now you know exactly how to make a set of 3d tshirts!
i hope i was able to explain how i made these clearly. please let me know if you are confused with anything and i'll do my best to explain it another way.

thanks!


 - By Matteo Villa