Page 1 of 1

Junaid Rashid's Entry

Posted: Fri Apr 12, 2013 2:11 pm
by junaidrashid
Maxwell challenges are always fun and learning oppurtunity is maxiumum.
Here is how i set up the scene using the information as discussed in the forum here.

Image

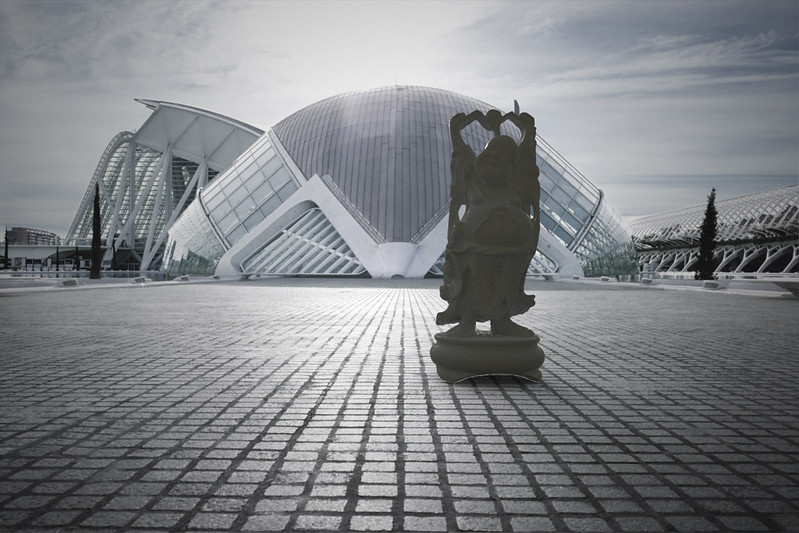
But strangely, i always get mis-matched shadow and few pixels always misbehave. i tried different object and aligned them properly with base plane. But when i add shadows in post-production test.. it always fails (like image above).

Another (possibly dumb) question, how can i attach image in this post?? So far i have to host it on flickr.

Re: Junaid Rashid's Entry

Posted: Fri Apr 12, 2013 2:37 pm
by garyb
To get the shadows correct you have to render out just the shadows with the statue hidden to camera. Then you can composite the shadows in afterwards.

Check out the manual here:
http://support.nextlimit.com/display/ma ... ow+channel

Re: Junaid Rashid's Entry

Posted: Fri Apr 12, 2013 3:05 pm
by junaidrashid
i'll be trying that.. but no information given how to actually do that. Is it just multiply? I guess it would be tricky..

Re: Junaid Rashid's Entry

Posted: Fri Apr 12, 2013 3:23 pm
by Mihai
I don't understand, it's pretty clearly stated on that page:
By default when you choose to render a shadow pass, any visible objects in the render will become fully white in the shadow channel, thus obscuring parts of the shadow channel. This is done in order to be able to render both the main render and a shadow channel at the same time. It can however cause problems when compositing this knocked out kind of shadow pass with objects that have been cut out from the background using an alpha channel. You may see a few faint white pixels along the borders of the object and the shadow pass, depending on the brightness of your background and the objects.

The solution is to render a separate shadow pass with full shadows simply by hiding to camera all the objects in the scene and rendering only the shadow channel (all other channels off including the main render).
Which part is not explained?

Re: Junaid Rashid's Entry

Posted: Fri Apr 12, 2013 3:42 pm
by junaidrashid
Thanks for your reply. I can totally understand. But compare to this
In your compositing application (image or video compositor), the shadow channel should be placed in a layer between the main render channel and your background, and set to Multiply blending mode. This will render invisible any white areas of the shadow pas
The above gives details of how to do it in compositing software (e.g. PS) using Knocked out shadow pass. i.e. Multiply.
Anyways, i 'll try to search it out it what to do with separate shadow pass e.g. Simple multiply will work??

Re: Junaid Rashid's Entry

Posted: Fri Apr 12, 2013 3:57 pm
by Mihai
It's the same procedure, you still get a shadow pass image which you have to composite in PS as described in your quote. It's just that the shadow pass will look different - look at that page again to compare what knocked-out vs full shadow pass looks like.