User avatar
By caryjames
#277210
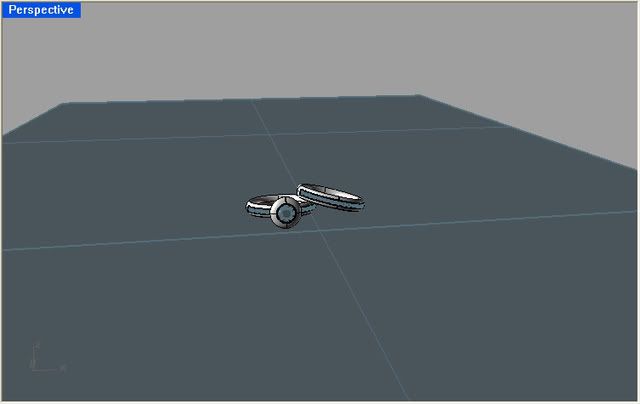
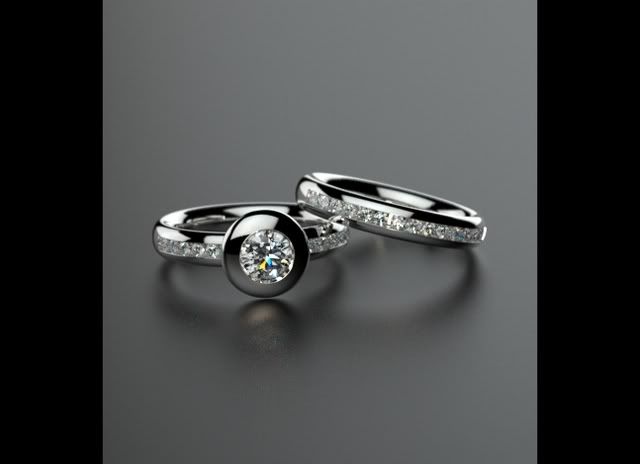
Hi JD and everyone: I am trying to create some images for print and want to make sure of the resolution that I am rendering at. First, I have no idea of the resolution that one would need for high quality printed material so please take this with a grain of salt.

I see in the manual that it is .....possible to render at very high resolution 6000 x 6000 pixels with 2 Gigs of ram without losing quality... or something like that, but when I look to increase my resolution there are presets at 1280 x 1024 as the maximum.

Would this resolution be sufficient for high quality printed material?
If not how would I change the resolution to be more suitable?
If I am using Render Blow Up for a close up of a scene will this change the resolution anyway?

Sorry for the basic questions I just don't want to waste my time rendering things at resolutions lower than required. Thanks again for your responses!!!
Cary
User avatar
By polynurb
#277218
caryjames wrote:.., but when I look to increase my resolution there are presets at 1280 x 1024 as the maximum.
..true the slider tops there... but why use the slider... just type in what you need!..uncheck"lock ratio", below to change film aspect.

btw. afaik, for offset print you need about 300dpi.. which is ~ 2500x1600 pixel width at A5 format
By JDHill
#277220
Hi Cary,

I can't tell you exactly what resolution you would need, but I'll say a bit about the subject in general, and how it relates to the plugin's Camera object. The presets you find in the drop-down are just meant to set the Camera to certain common formats, but they mostly relate to video formats - mainly I leave them in so people don't have to look them up elsewhere. For still shots destined for print, those presets would not likely give close to enough resolution - you're probably dealing with something more like 300dpi, which for a 1024px image gives you only a little better than three inches of print.

The way the plugin works in the last few versions will allow you to treat the setup in three separate steps:

1. setting up the shot
2. setting up the frame
3. setting up the image

For the first, I basically mean: pull the Rhino camera around to the position/target you want, but don't really worry about how it relates to the framed image. At this point you are just thinking about getting your perspective set up, which in Rhino basically means camera location/direction/lens length. Once you have that taken care of, probably you will want to save it as a Named View.

In the second step, you will be thinking about how the image is framed - the perspective has been set up, now you want to use the Maxwell Camera's film size and offset parameters to pull the frame in on your subject. When you do this, you will see the Image Output > Size Mode switch to 'Manual' - once in manual mode, the plugin will no longer alter the film or resolution to match the viewport. This is important, because in the automatic Viewport mode, even moving a toolbar will change the frame. This is the step where you would want to make sure the plugin's Camera Heads-up Display is enabled - it will allow you to see what you're doing with the film size/offset.

In the third step, all of the positional and physical aspects of the Camera itself are taken care of - the only things left are to adjust the exposure as necessary. When doing so, the most convenient way is to turn off Auto-Exposure and use shutter/ISO to get the basic exposure dialed in. Once they are, re-enable Auto-Exposure, and adjust fStop to get the Depth of Field you need for this particular shot. If you later find the exposure unsuitable, you can change the Camera's EV to adjust exposure without affecting the relative relationship of the three parameters (fStop/shutter/ISO) which it represents.

As this relates to your initial question about resolution, we are talking about step 2: once you are in Manual mode you can adjust the image output resolution to be any size you wish - it does not depend at all on the viewport size/aspect; instead, it is derived from the film size. You can either use the Lock Ratio switch on the film back, which will keep the output resolution in sync with the film size, or you can turn it off and use the resolution to drive the film size - one way or the other, the aspect ratio of one will always be kept in sync with that of the other.

I hope you find this to be a useful strategy. :)

JD
User avatar
By caryjames
#277228
WOW: This is a lot to digest. So far I had been only concentrating on DOF, materials, lighting etc- I hadn't been concerned with my resolution. Thank you both for taking the time out to explain this to me. I will take some time tonight to look at those settings and setup and see how I can proceed.
THANKS!!!
Cary
User avatar
By caryjames
#277247
Hi JD: After re reading your post it is coming to my mind that I have a different and possibly inefficient work-flow that I think comes from a lack of understanding of Maxwell and it's various uses and issues surrounding starting, stopping, and resuming renders. Here is an example of my work-flow.

* I set up my scene in Rhino and then in the Perspective viewport I click on the word Perspective and select 35mm as the camera

* I then back off the piece I am going to render so that when I select my F stop and use Render Blow Up that the scene will be in focus

* Then in the Scene Manager I select an F stop for the shot- usually I use 75 so that my scene is in focus or at least at the front of my ring/jewellery object

* Once my render is started I will adjust the Shutter and ISO as the render is working. If I need to change my F stop I first cancel and stop the render then I go back into Rhino and reopen the Scene Manager, then change the F stop and re-render.

If you have any suggestions on a better flow I would love to hear them :).

JD, I am a bit unclear on a few issues.
1) If I am "framing" my shot using the Render Blow UP feature do I still need to worry about your Step #2 or in effect am I already "Framing" the shot?

2) Can I select a high resolution so that my finished render prints correctly - say 300 dpi or 400 dpi so at least 2500 x 1600 pixels (thanks Polynurb) and then use the Render Blow Up feature? Or will my using Render Blow Up effectively change the presets and the finished quality of my render? Essentially I want a very high resolution image of a Blow Up of my render.

Thanks everyone again for helping, I know that I say it a lot but I really do mean it!!!
Cary
By JDHill
#277254
If I am "framing" my shot using the Render Blow UP feature do I still need to worry about your Step #2 or in effect am I already "Framing" the shot?
Sure you're framing a shot, but you're really not close to framing the shot. What I mean by that is: how can you repeat it? You could come close by trying to remember how you selected the blow-up rectangle, but it will not be accurate. On the other hand, I'll use the pics from the manual again...here's a subject framed using a custom film with the plugin's heads-up display:

Image

What is inside the rectangle is what will get rendered. You could get close to the same thing by changing the film size to a decent guess and using blow-up render, but that's sort of putting the horse before the cart: if it is the final image size you're after why not start out by defining that and then work from there? So back to the screenshot - apparently I have a customer who needs output that's 616x524. If you measure the screenshot, you can see that's not how big the rectangle is (in fact, that is the size of the whole viewport) - but it is how big the render will be.

So fine, I've got the image size set how I need it, and everything is framed how I want. What happens if I change the size of the viewport?

Image

Here's where the trial-and-error method of picking a rectangle to use the blow-up feature starts to wear thin -- how would you be able to guess that this was the same rectangle you saw in the first screenshot? Even if it looks funny, I can tell you - the relationship of the subject to the framed image is the same in both screenshots, and you can see the output resolution is still the same 616x524 - these two viewports will produce the exact same image when you hit render.
Can I select a high resolution so that my finished render prints correctly - say 300 dpi or 400 dpi so at least 2500 x 1600 pixels (thanks Polynurb) and then use the Render Blow Up feature? Or will my using Render Blow Up effectively change the presets and the finished quality of my render? Essentially I want a very high resolution image of a Blow Up of my render.
If you are very good at drawing blow-up rectangles, then yes, you can use that. But more likely than not, you won't draw a rectangle that has the same height x width ratio as the resolution you set, and you will find that there are portions of the image which are 'outside' the render: these will be seen at render-time as two black strips along the top/bottom of the image if your blow-up rectangle was too wide, or along the sides if it was too tall.

It's really much easier to be accurate if you use the manual size mode and define the frame using film size and offset. There's even a command to help you do this in the Camera toolbar: 'Pick Film-size Rectangle'. This command will set the film's size and offset by letting you draw a rectangle around the area you want to print. After the film has been defined, you can change the image size as needed.
User avatar
By caryjames
#277300
JD thank you for taking the time for that explanation. Up to this point I have been making "pretty pictures" I have not had to worry about repeatability and consistency so picking the rectangle manually was fine. I had not even thought about resolution and image size until yesterday when I started rendering for print. I do not come from the CG world and aside from a high school photography course (a long time ago :) ) I have not thought about any of these issues for a long time. I will try to take some more time setting up the heads-up display and go at this from another angle so to speak.

I still have one question though and forgive me because I am having a hard time understanding the difference between film size and resolution.

Once you have your rectangle or film size selected- in the case of your example the size is 616 x 524. Can you maintain the physical size of your image i.e the size of the rectangle, but give a higher resolution picture inside that frame? Basically I want my jewellery to have a certain relationship to the shot

Here is a shot I am working on, here is the perspective view from much the same distance as your example.

Image

And here is the final shot using my hit and miss method

Image

So can I still have a shot that keeps the jewellery in the frame to the same proportion but is done at a higher resolution?

or

If I go to a higher resolution will I in a sense get my jewellery being a smaller in the overall scale of the shot which I will then post edit in Gimp or Photoshop?

Oh and I finally got the scratchmap working correctly!! Thanks again for your reply!
Cary
By JDHill
#277304
Starting from your viewport screenshot, try this:

1. open the plugin's Camera toolbar, if it's not already open
2. left-click the second button, 'Toggle Camera Heads-up Display', so that you see the readouts in the selected viewport
3. left-click the third button, 'Pick Film-size Rectangle', and draw a rectangle similar to the one you did when you made that blow-up render

If any of these commands are missing from the toolbar, you have a toolbar from a previous version - go to the command-line and type 'Maxwell_ToolbarReset'.

4. left-click the first button, 'Toggle Camera LCD Display', so that it's shown

Now, you can adjust the film by clicking down the left mouse-button over the film width or height on the LCD and moving the mouse up and down (while the left mouse-button is still depressed) to adjust the numbers. As you so, the film rectangle should update interactively so you can see what you're doing. Once the rectangle is set, you can do the same for the image resolution - you should notice that you can set any resolution you want without affecting the film rectangle - it won't change the film, just the image output size.

Your render will look like what's inside the rectangle - the actual image size is arbitrary. You could render this rectangle at 20x20px or 20,000x20,000px - the images, other than one being physically larger, would be identical.
User avatar
By caryjames
#277306
JD- I know I say this a lot but THANK YOU!!!! I will give that a shot over the weekend. I have to update to version 7 which I will do before I start fiddling so that I know for sure that I am on the same page as you. Have a good weekend
Cary
the render does not start

I tried hiding many of the objects in the scene wh[…]

Sketchup 2024 Released

I would like to add my voice to this annual reques[…]